Download FTP Filezilla client
In this howto, we will use the Filezilla FTP client for our demonstration. It's free, light multi-platform, and very powerful. You can download it from here https://filezilla-project.org/
Add your new hosting account
Once you have downloaded and installed the program, opening it the first thing you will need to do is configure your new hosting. Click on the button indicated by the arrow to add your new hosting: "Open the Site Manager"
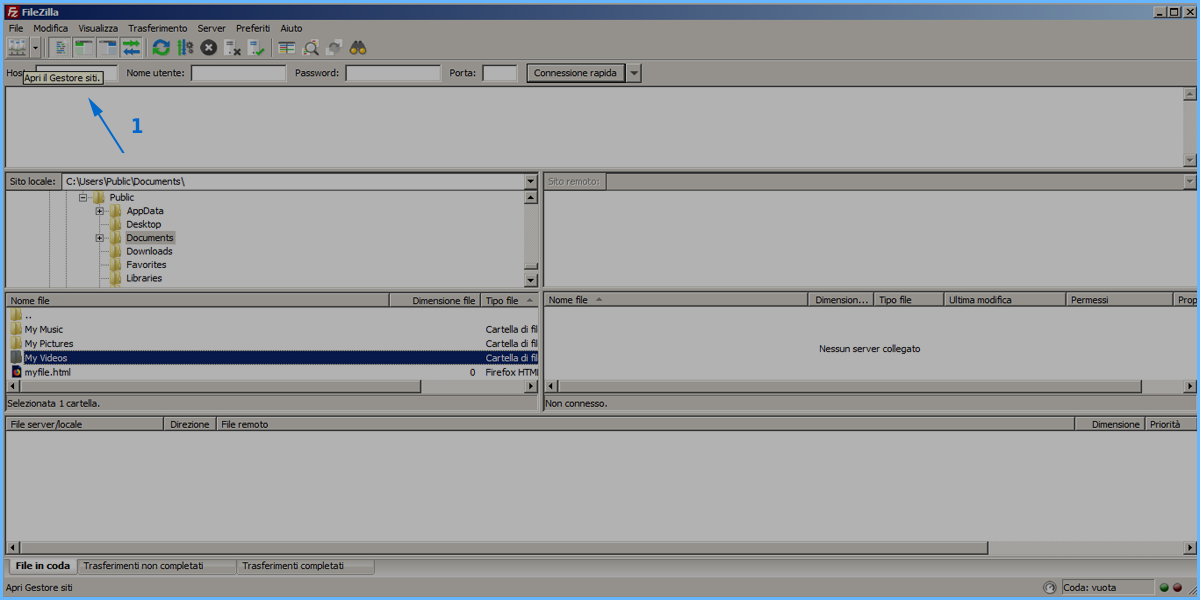
Now the following screen will appear, through which you can configure your hosting. The following is a step-by-step configuration.
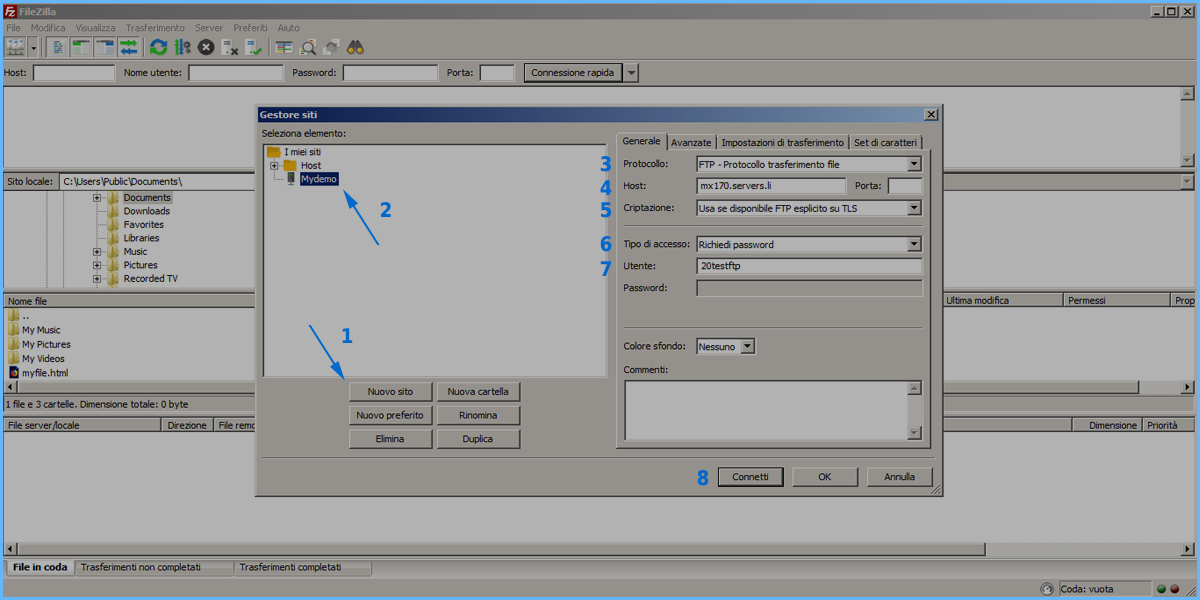
You can proceed by following the order of the points, entering the following data:
- Click on the "New site" button to add your new hosting
- Enter the name of your new hosting (eg Mydemo in this guide)
- As type of Protocol, enter "FTP - Data transfer protocol"
- The Host is the server you will need to connect to. The correct name has the following syntax: mxNNN.servers.li. Where NNN is the node number where your hosting is located. Find this host name, either in the activation email that was sent to you. Both inside your control panel. Please refer to the dedicated section if you have problems finding this information
- Under "Encryption" enter "Use if available explicit FTP on TLS"
- Under "Access Type" enter "Request Password"
- As User enter the username that was provided to you during activation. The Password is not necessary to insert it at this time as it will be requested from time to time for a security reason, by Filezilla.
- Now the configuration is finished you can save using the Save button
Your new hosting is thus configured. You can proceed to the next step and make your first connection.
First connection to your new website
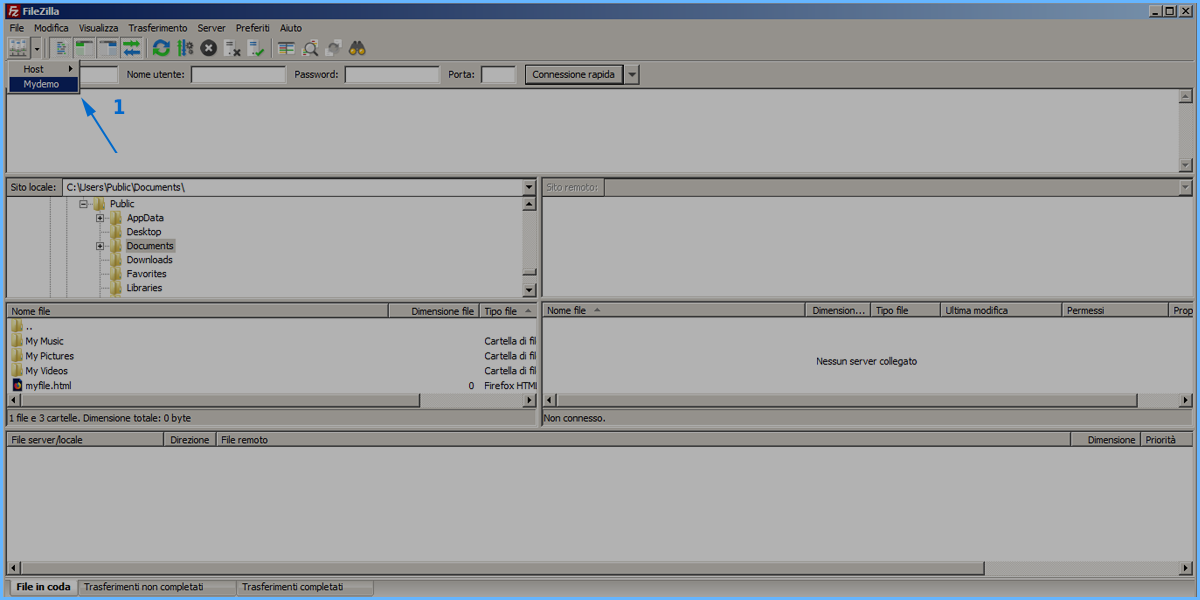
From the main screen click again on the "Site Manager" icon. From there click on your new hosting (in the case of this demo, called Mydemo)
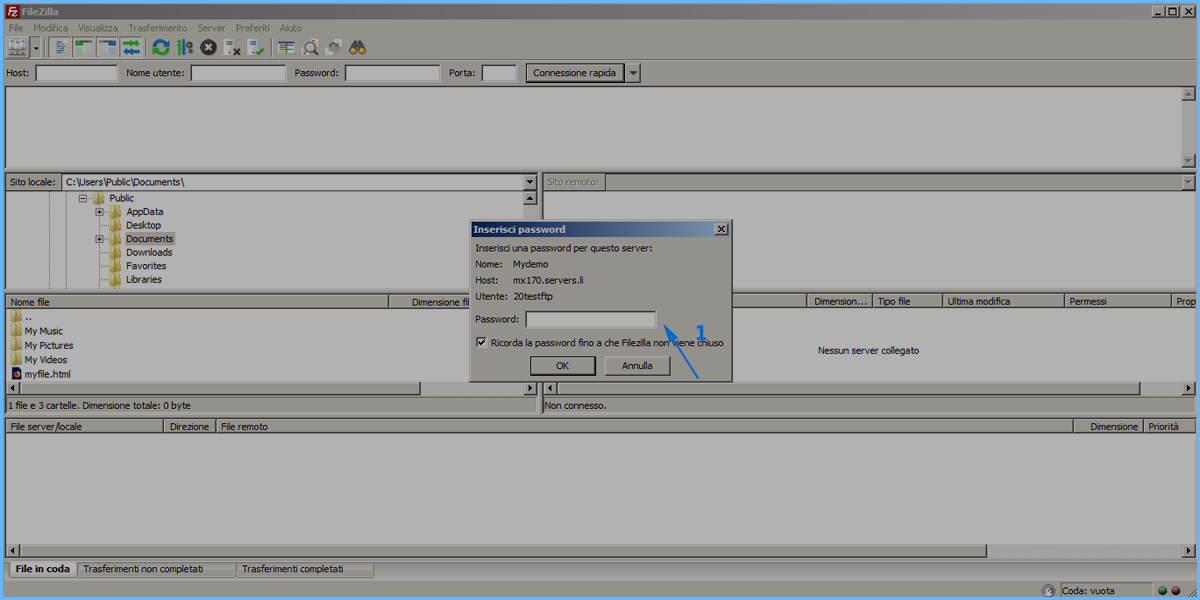
Enter the password provided as required by the software
And approve the verification of the SSL certificate (used to secure the connection to the server)
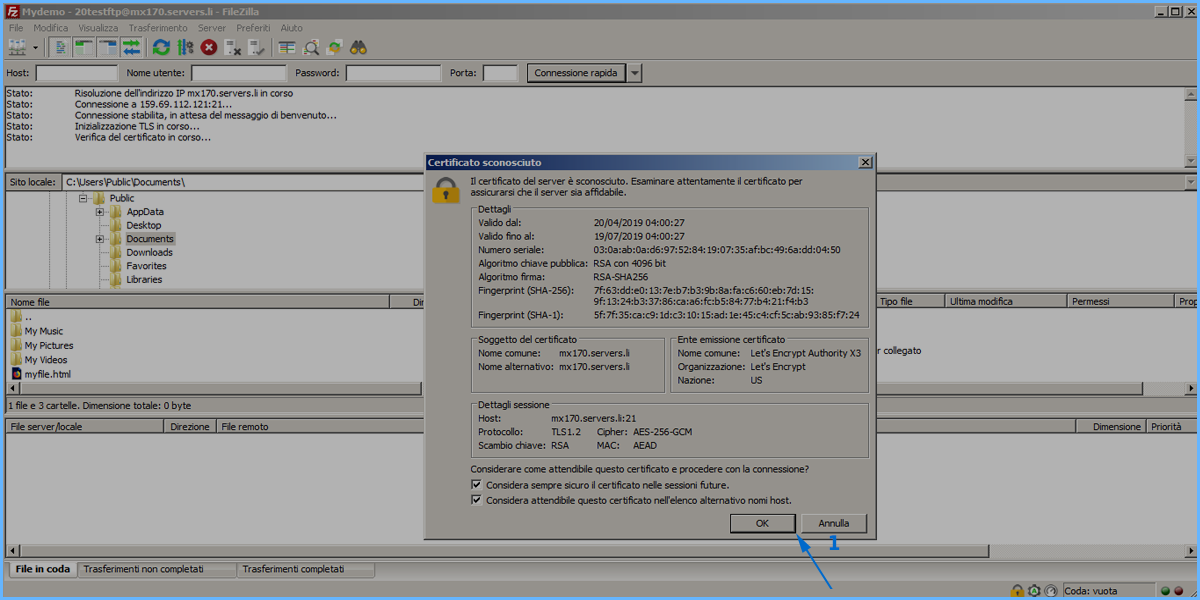
You are now connected to the server and can upload your data.
Upload your first file
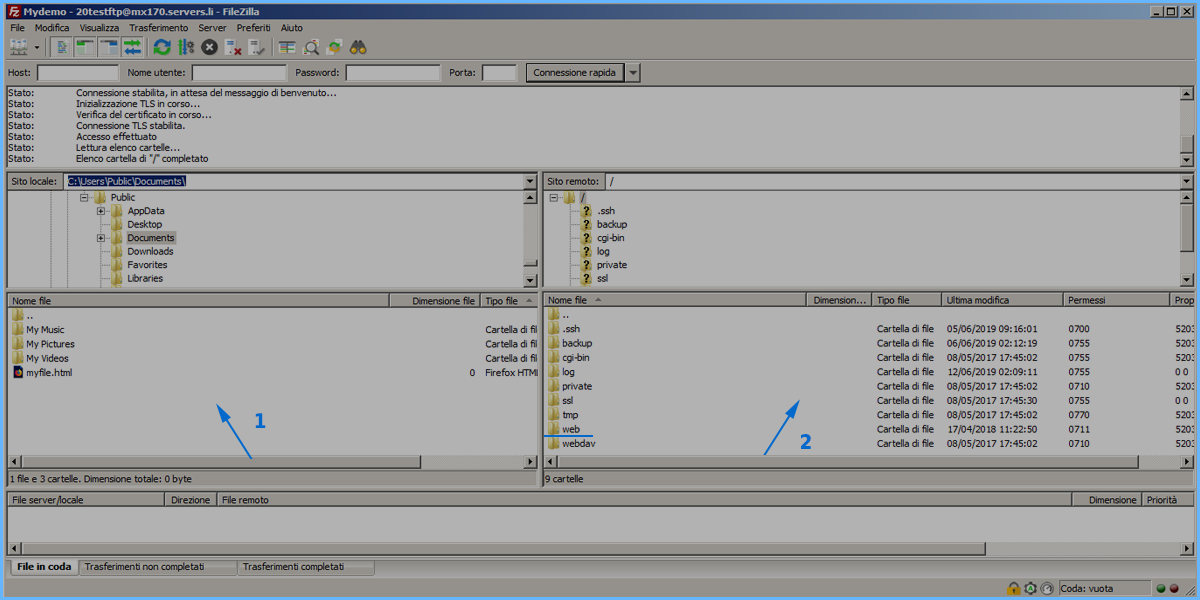
Now that you are connected, you will see that in section 1 (indicated by the arrow) there are your files on your computer. While in section 2 (always indicated by the arrow) there is the remote content of the server. The remote folders that interest you are the following (the others are system-based and you may not consider them for the moment):
- web: it is the public folder of your site. All data on your website must be uploaded to this folder
- logs: is the folder that contains the web server logs. If during the creation of your site / application, you need to see what kind of calls or errors are generated on the server, you can see them in here.
The publication operation is very simple. Just click on the web folder on the server to open it. Then you can drag files from your local computer to that folder. When upload is finished, the file will be publicly available. To download the file the procedure is the same but inverse. That is, just take the file on the server and drag it locally to your computer.
Final note
Inside the web folder, there are two directories: error and stats. The first contains standard system pages. While the second one contains the statistics of your site. You may not touch these two folders.
RIF. https://miw.li/KBDE1EN

