How to activate
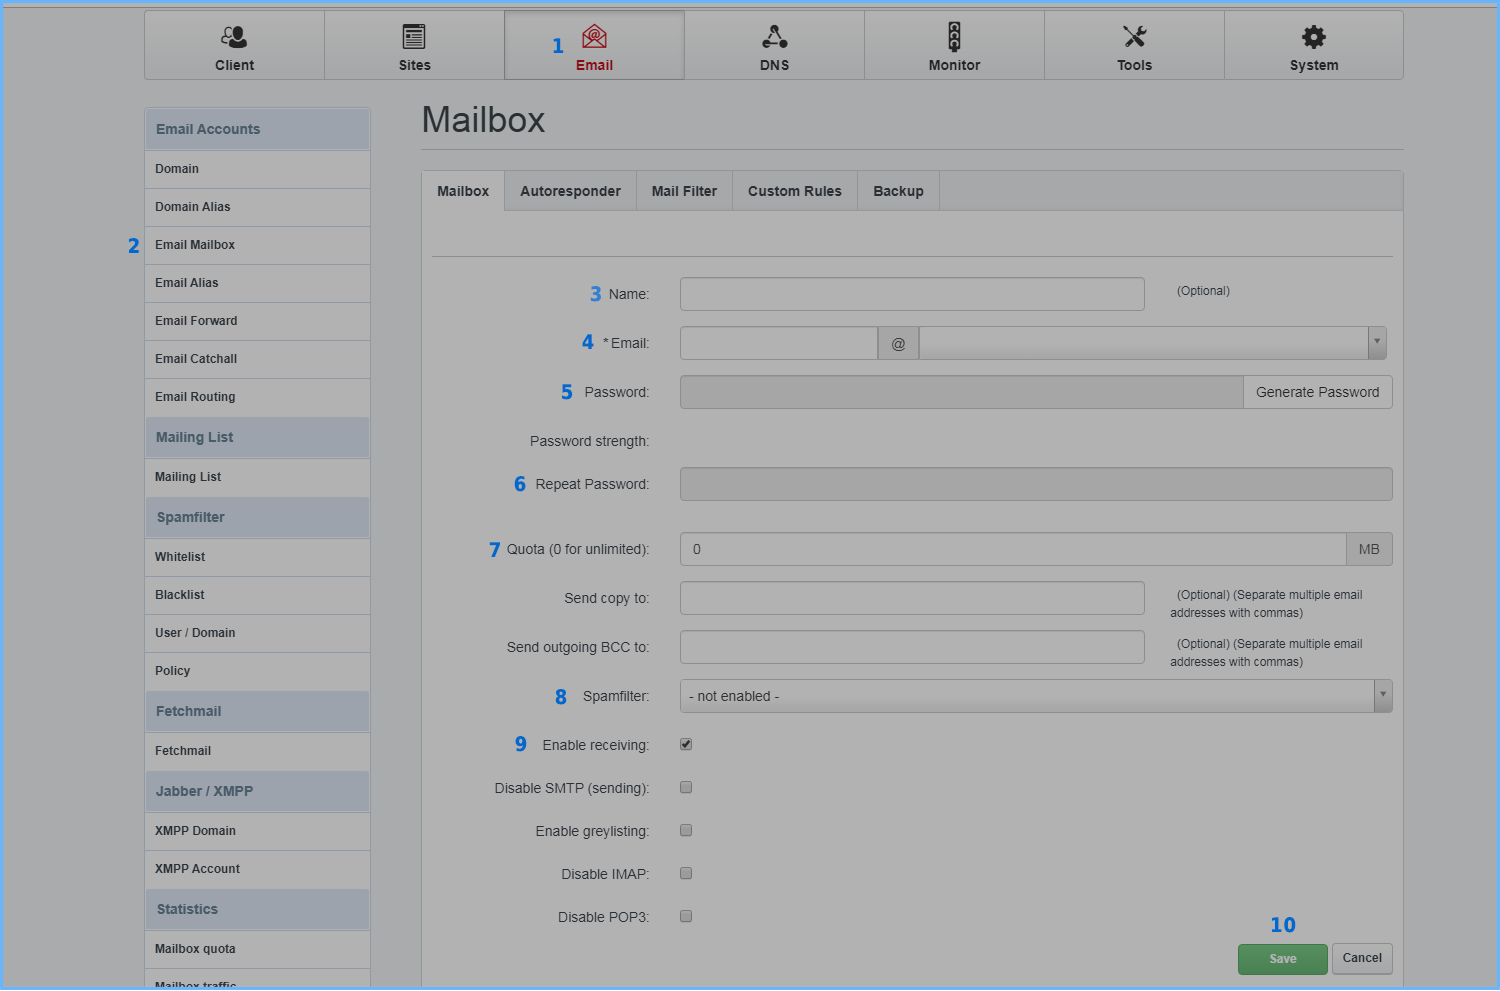
Creating a new email address is very simple. You can do this from your control panel https://servers.li by entering with your user credentials. If you do not remember them you can request them from your customer area. Once logged in you can go to the Email (1) > Email Mailbox (2) section. Here you have to click on the button "Add new Mailbox". You will find the interface in the following figure, which you can fill in as follows.

Name (3): This is a mnemonic name that you can give to your inbox.
Email (4): This is the actual mailbox. You can enter here the username, i.e. the left part of the snail (username@) and choose your domain on which to create it, i.e. the right part of the snail (@yourdomain.com).
Password (5): The password of your box. We recommend using the "Generate Password" button to generate a secure and robust password.
Repeat Password (6): Repeat the password above.
Quota (7): Depending on the hosting plan you have available, here you can specify the quota of the box.
Spamfilter (8): Choose the antispam policy to use for this box. Typically "Normal" is good for most users.
Enable Receiving (9): Make sure this item is enabled.
All other entries for the moment can remain with their default value. Once compiled, you can click on the "Save" button (10). After a few minutes your box will be operational. And you can use it either from an email client (to configure it we refer you to the appropriate guide), or from a webmail at http://webmail.NOMEDOMINIO (you will then be redirected to the webmail in https).
Final Notes
From this same section, you can change the settings of an existing box if you wish. For example, change the password to a different one, or change the antispam or quota settings.
You can also check the Move Spam Emails to Junk directory using the "Mail Filter" tab. This checkbox will move all emails taken as spam to the spam folder that you can view from your webmail.
RIF. https://miw.li/KBDE492EN

